Body
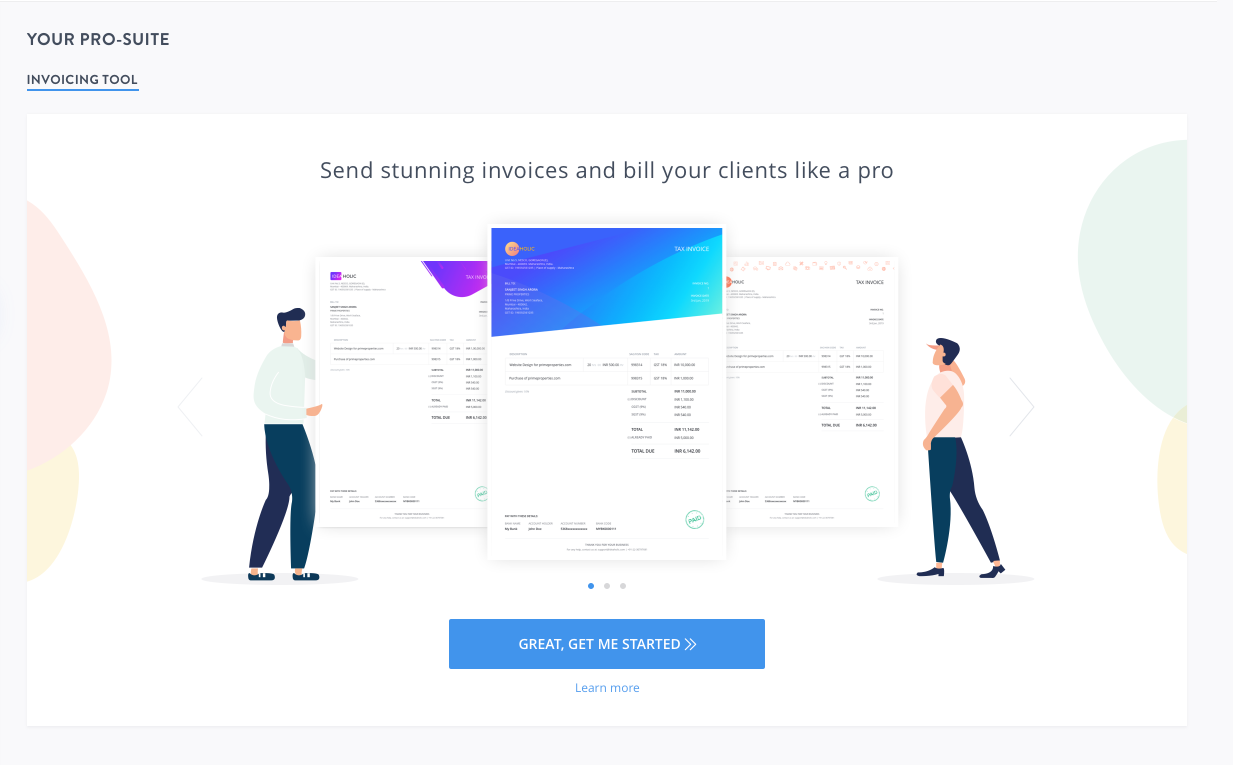
With the new invoicing tool you can bill your customers for your products and services and send professional looking invoices with beautifully designed templates. You can also customize your invoice to suit your brand and business - choose a background colour, add your company logo and personalize the invoice with your payment details.
Step 1: Log in to your control panel. Learn how
Step 2: Navigate to the Pro-Suite tab.
In the side navigation bar click Pro-Suite
Step 3: Enabling the Invoicing Tool.
- On the Pro-Suite tab, you can activate the invoicing tool and customize it, by clicking Great, Get me Started>.
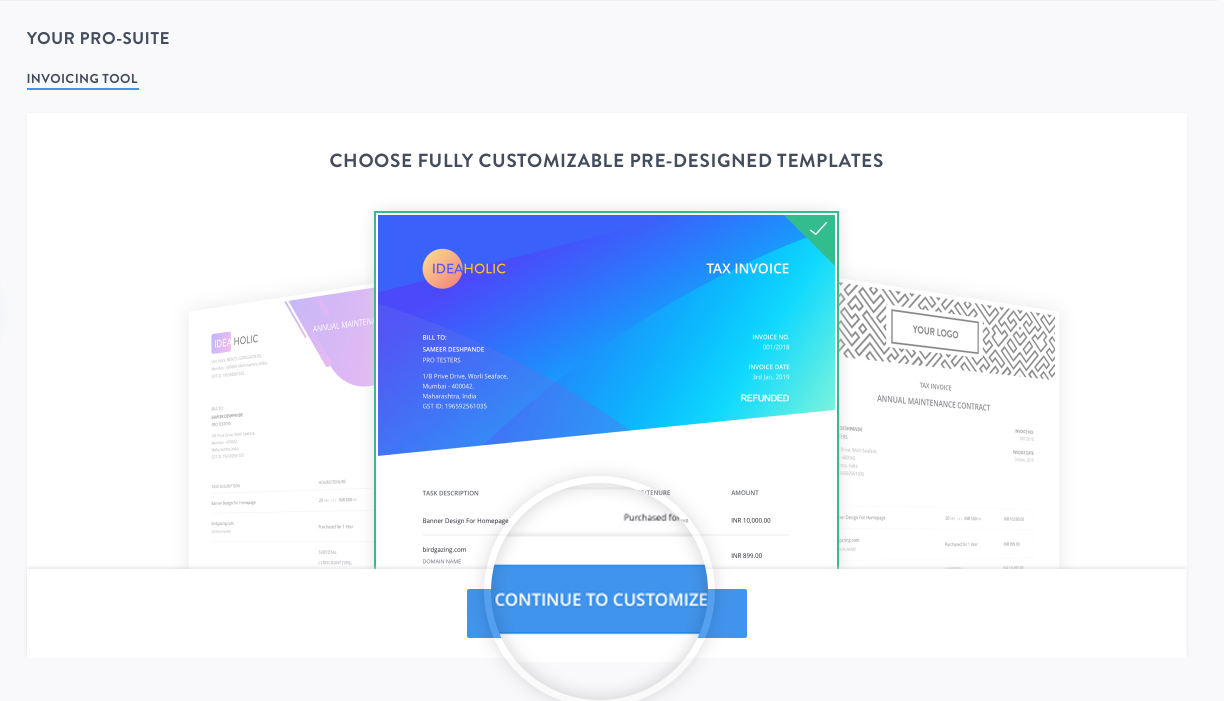
- Choose a template for your invoice.
Note:
You can change the template anytime from this tab.
- Click Continue to Customize to setup your invoice.
Step 4: Customizing your Invoice template
Before you can send out your first invoice, you need to enter your business details and personalize the invoice as you require. You can modify the following details as mentioned below.
- Changing the background colour.
Choose from a range of colour swatches and pick a one that reflects your business identity.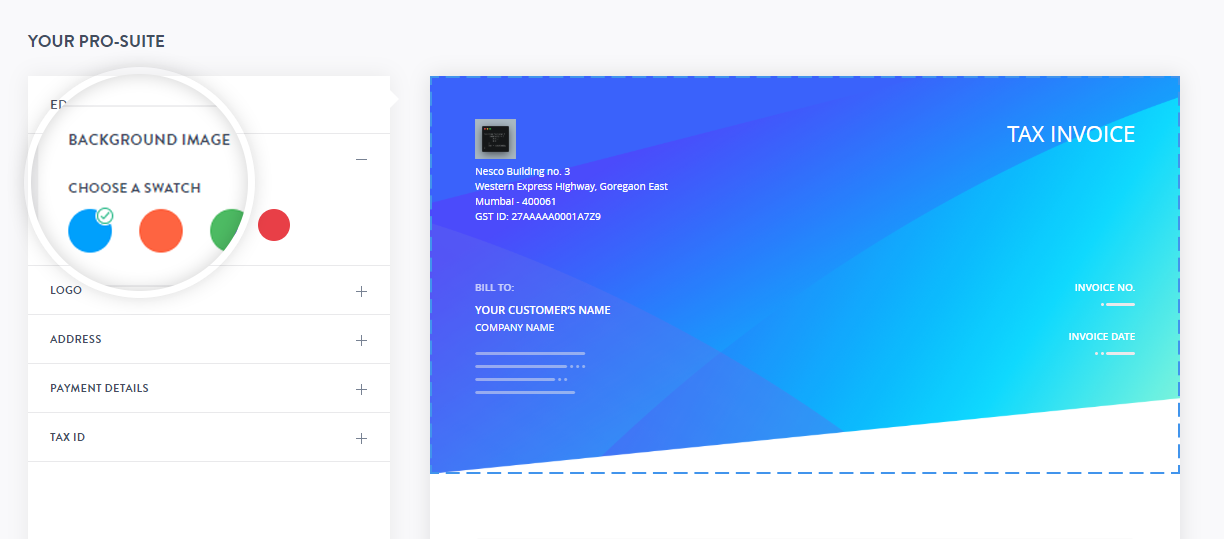
- Adding your business logo.
Upload your business logo to see it on all your invoices.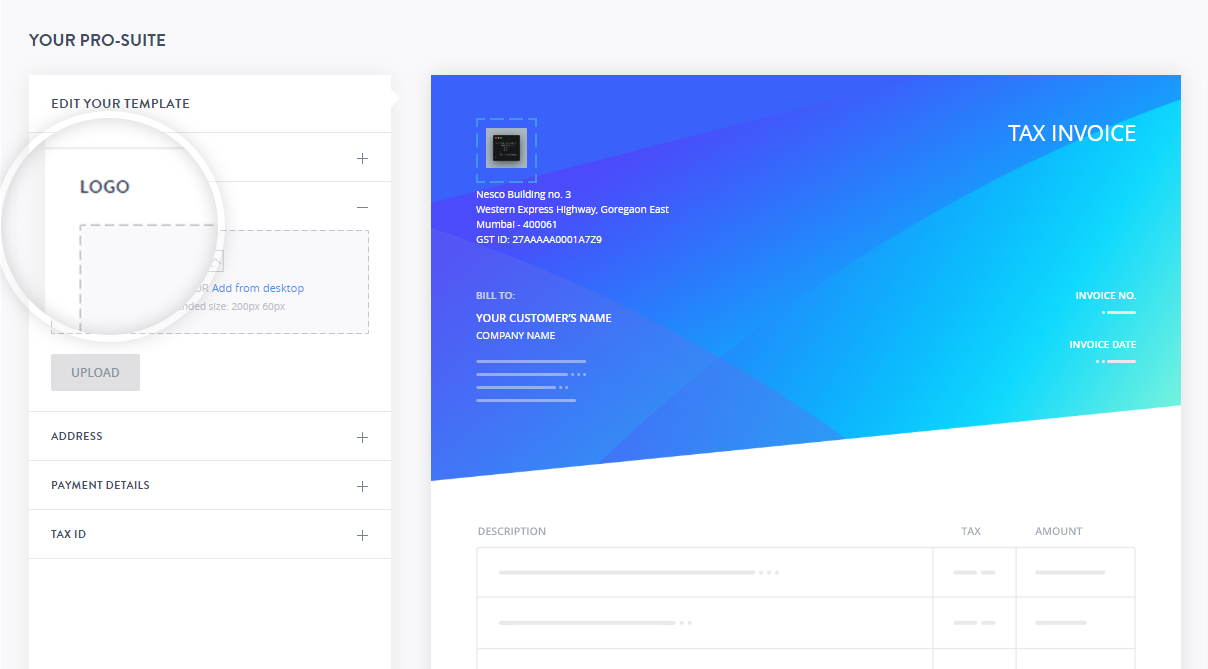 Note:
Note:- We recommend adding a logo that has your company name.
- The recommended size for logo is 200 px x 60 px.
- Adding your billing address
The address on the invoice is auto fetched from your profile.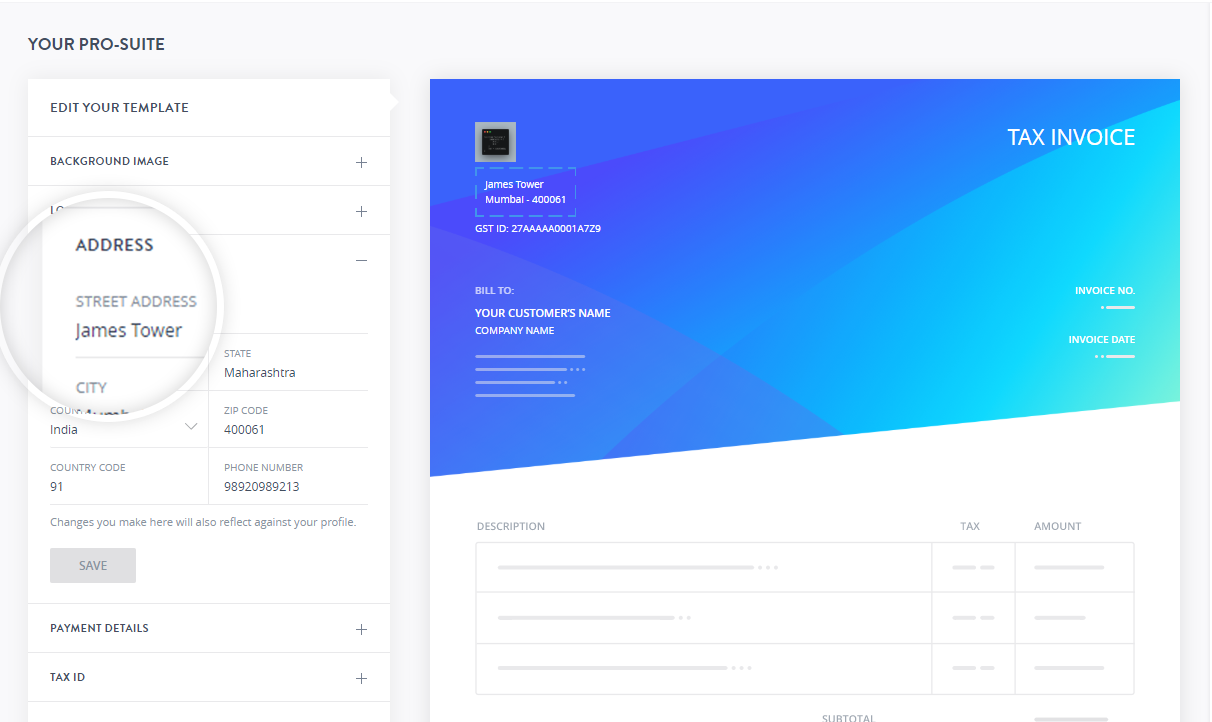 Note:
Note:Modifying the address on this page will also modify your address on the profile.
- Adding Payment Details
Add the bank details of the account where you would like to receive the payments for the invoices. You can also mention details of additional payment methods that you support.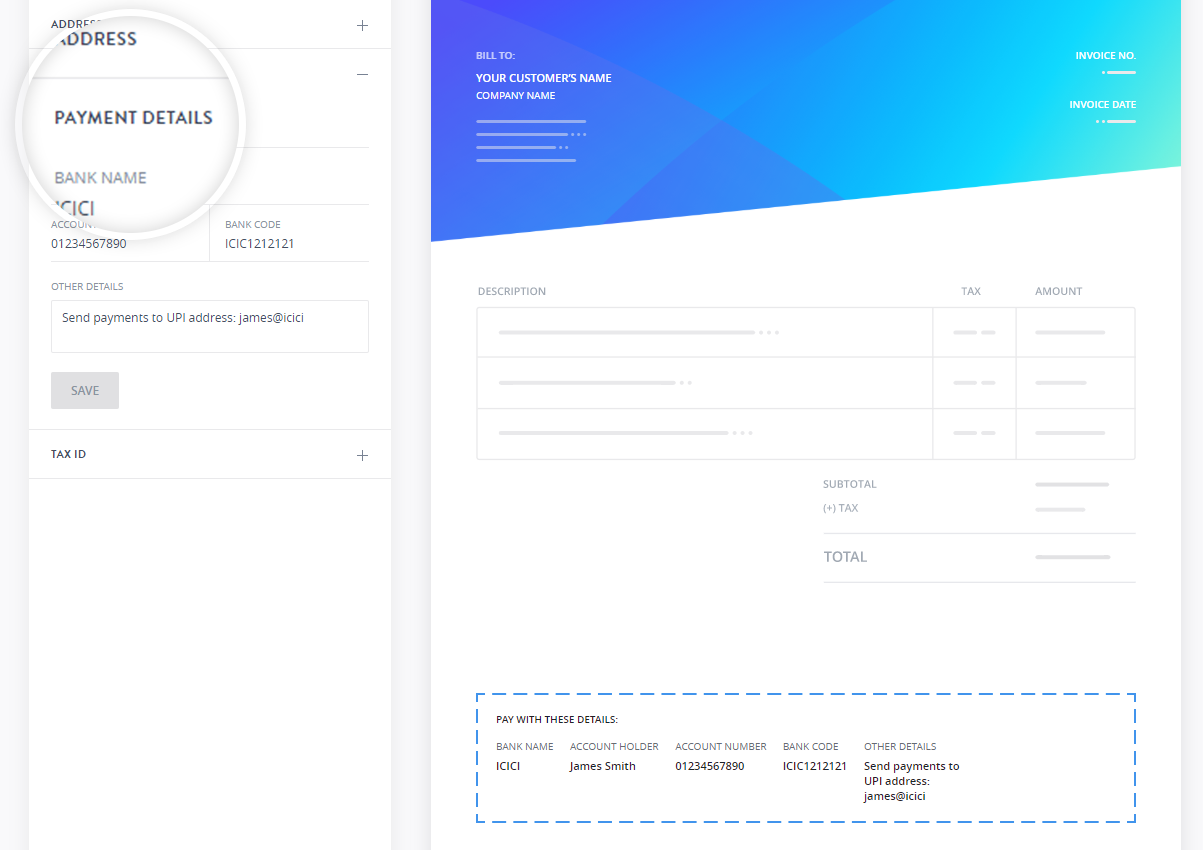
- Tax ID
Enter your Tax ID in this field.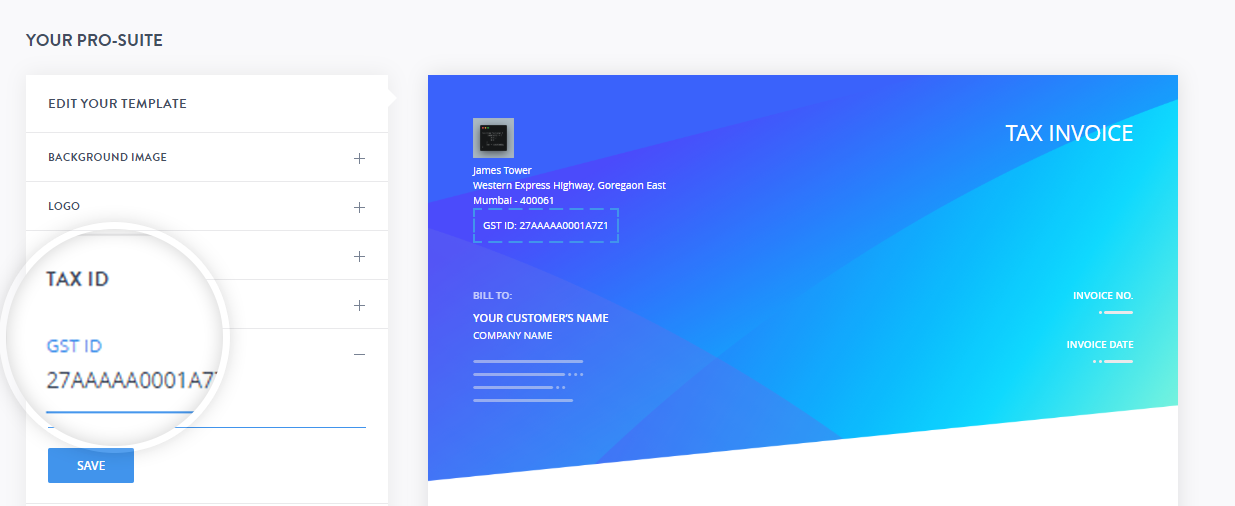
- Changing the template.
During customization, you can also change the template which you selected earlier, by choosing any template from the CHOOSE YOUR INVOICE TEMPLATE section on the page.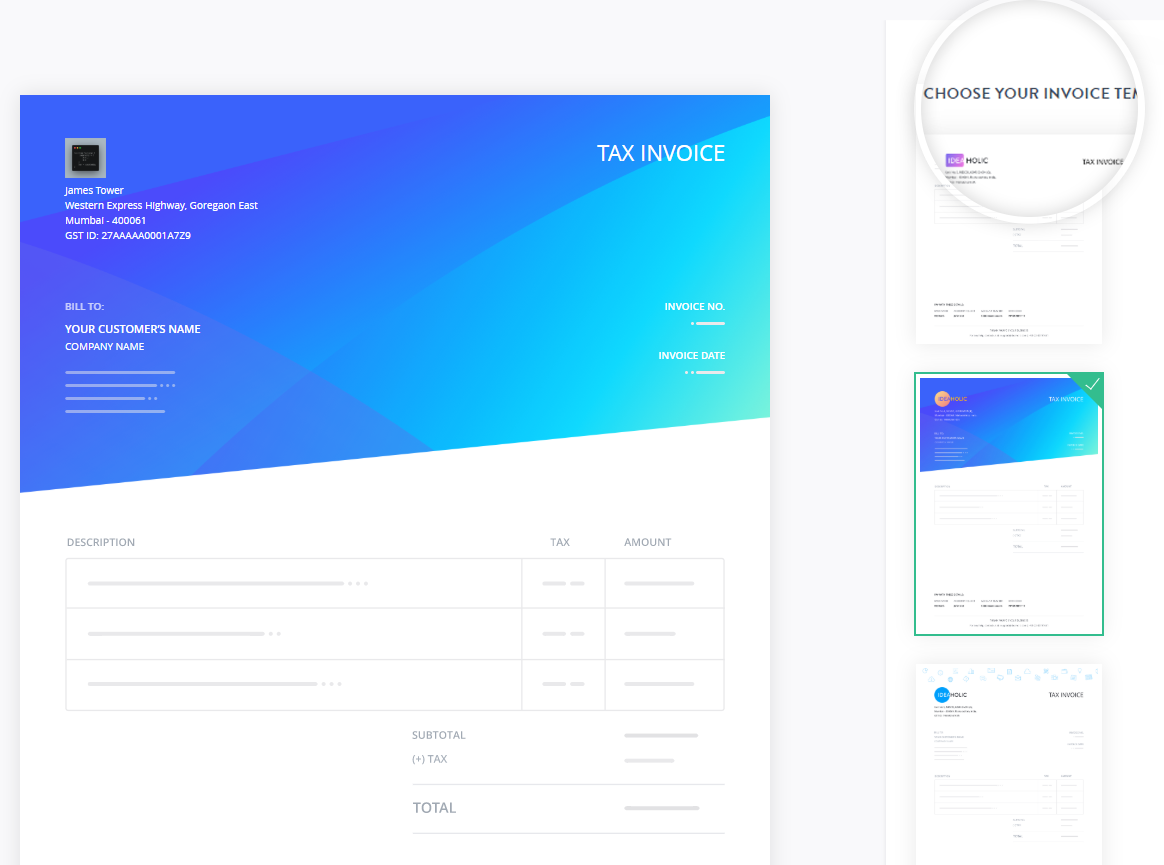
Your invoice template is now ready for use.