Before you create an invoice, ensure you have activated the Invoicing Tool. Read Getting Started with the Invoicing Tool.
To create a new invoice follow the steps mentioned below.
Step 1: Log in to your control panel. Learn how
Step 2: Navigate to the Customers tab.
Step 3: Create an Invoice.
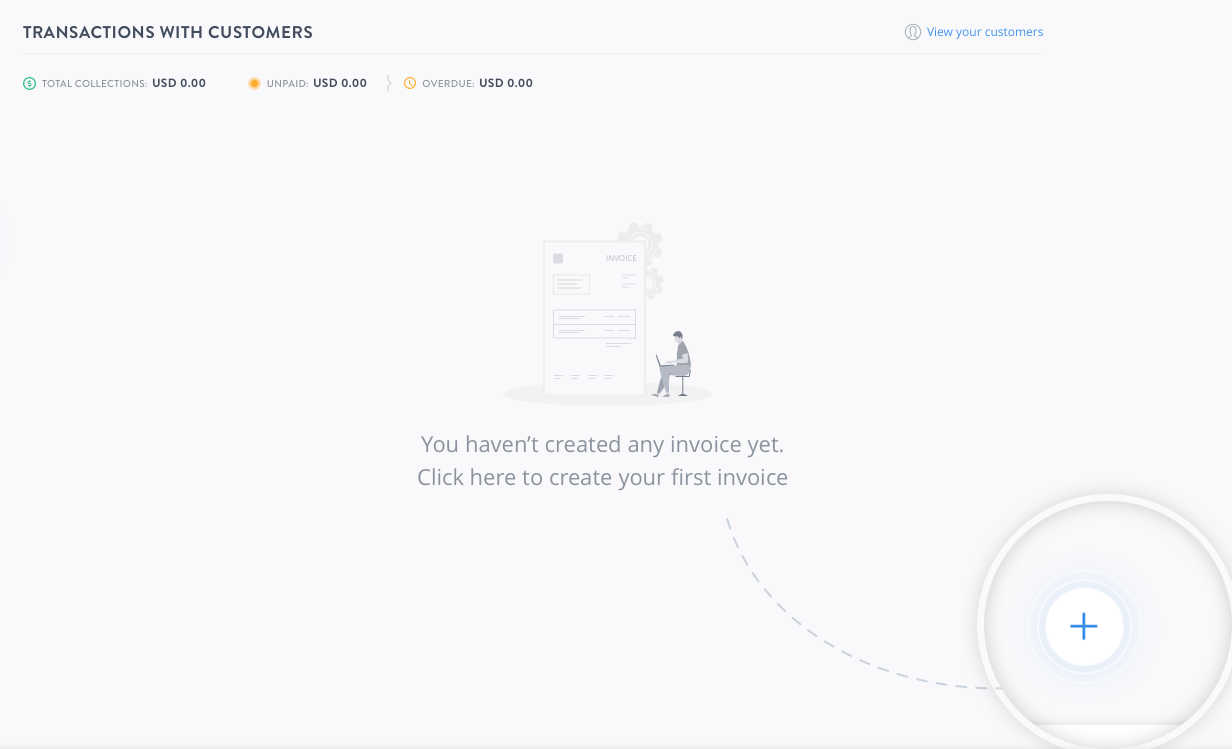
- Click the + icon.
- On the create invoice page enter the customer details. You can search from a list of existing customers or add a new customer.
If you choose to add a new customer, they will get added to your list of customers. An account will be created for your customer and they will be able to log in and view the invoices you raise for them.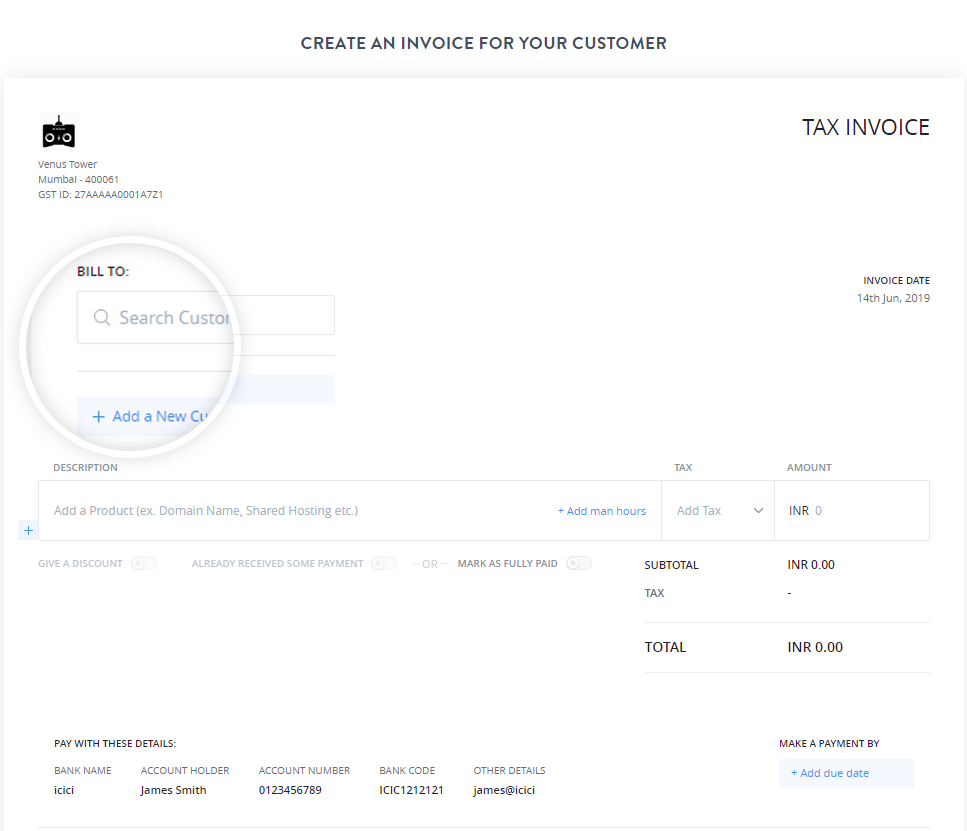
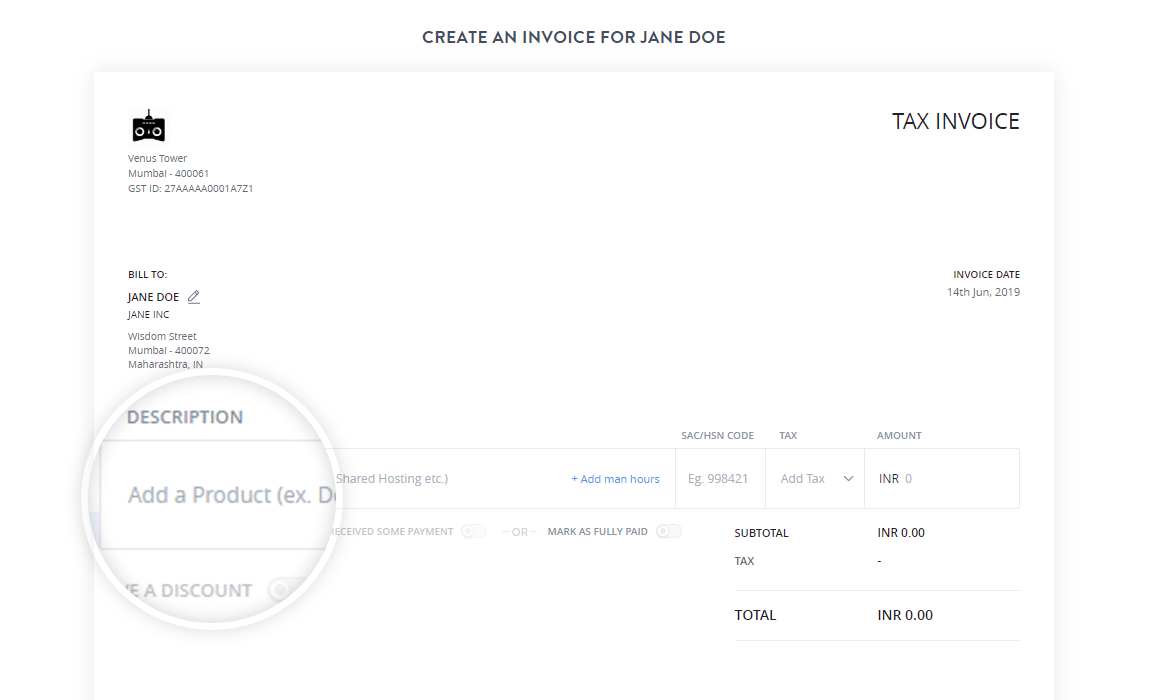
- Enter the Product description, tax details and the amount.
Pro Tips
Adding Man hours to your Invoice
If you want to charge for your services, based on man-hours, you can include this information in your product description by clicking + Add Man Hours.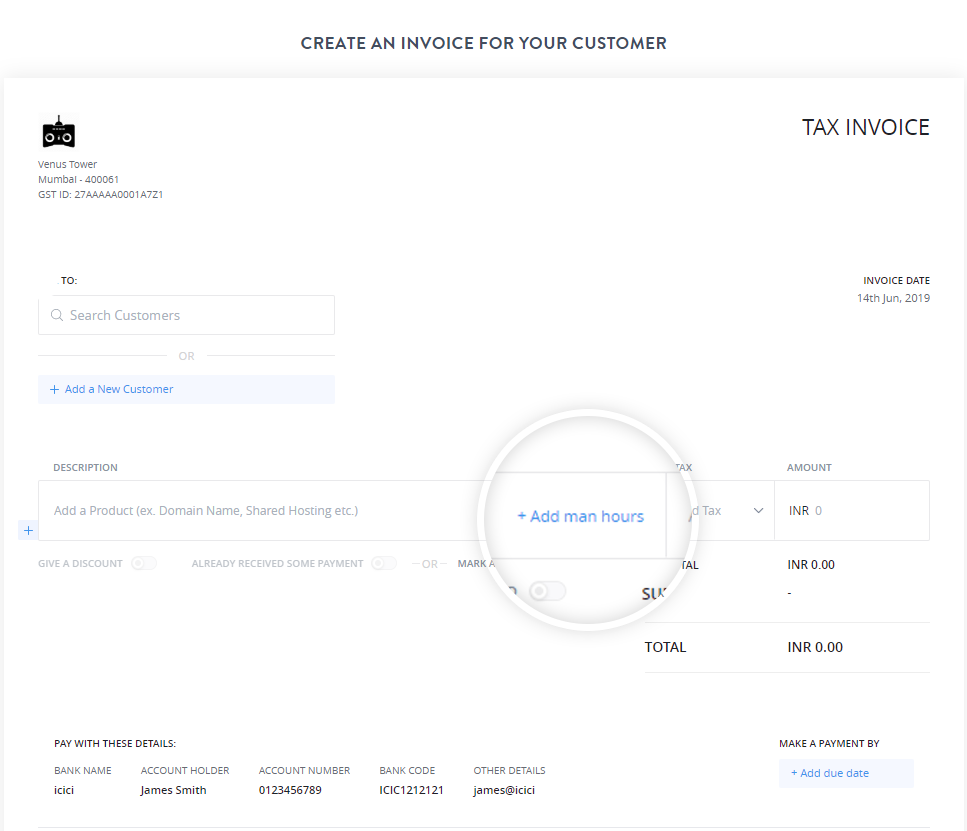
Adding a Line Item to your Invoice
To add a new line item in the invoice click +. To remove a description click the delete icon on the right hand corner against the line item you wish to delete.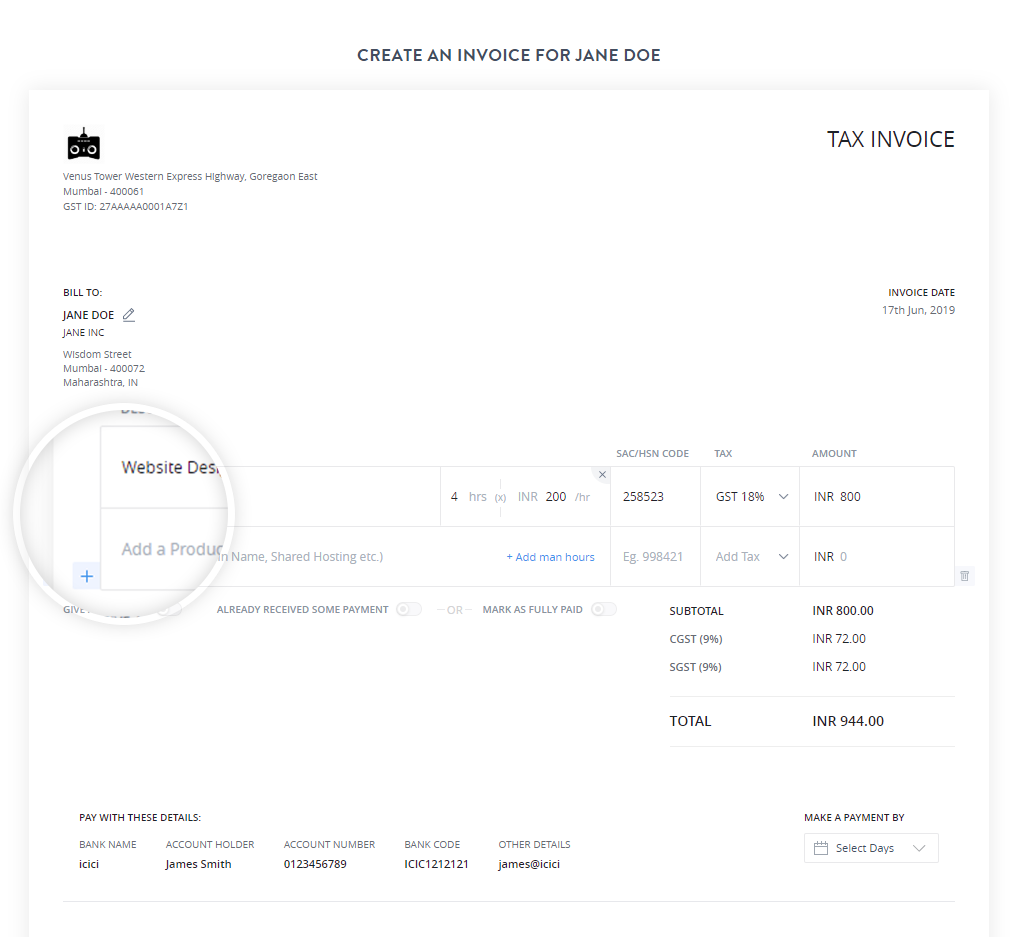
Giving a discount while creating an invoice
While creating an invoice you can give discounts and record them on the invoices. Discounts on invoices can be given in terms of percentage or absolute value. You can do so by enabling the GIVE A DISCOUNT toggle.
Once the option is enabled you can either specify the discount in percentage or absolute value. You will see the discount field added to the invoice and your total is updated automatically.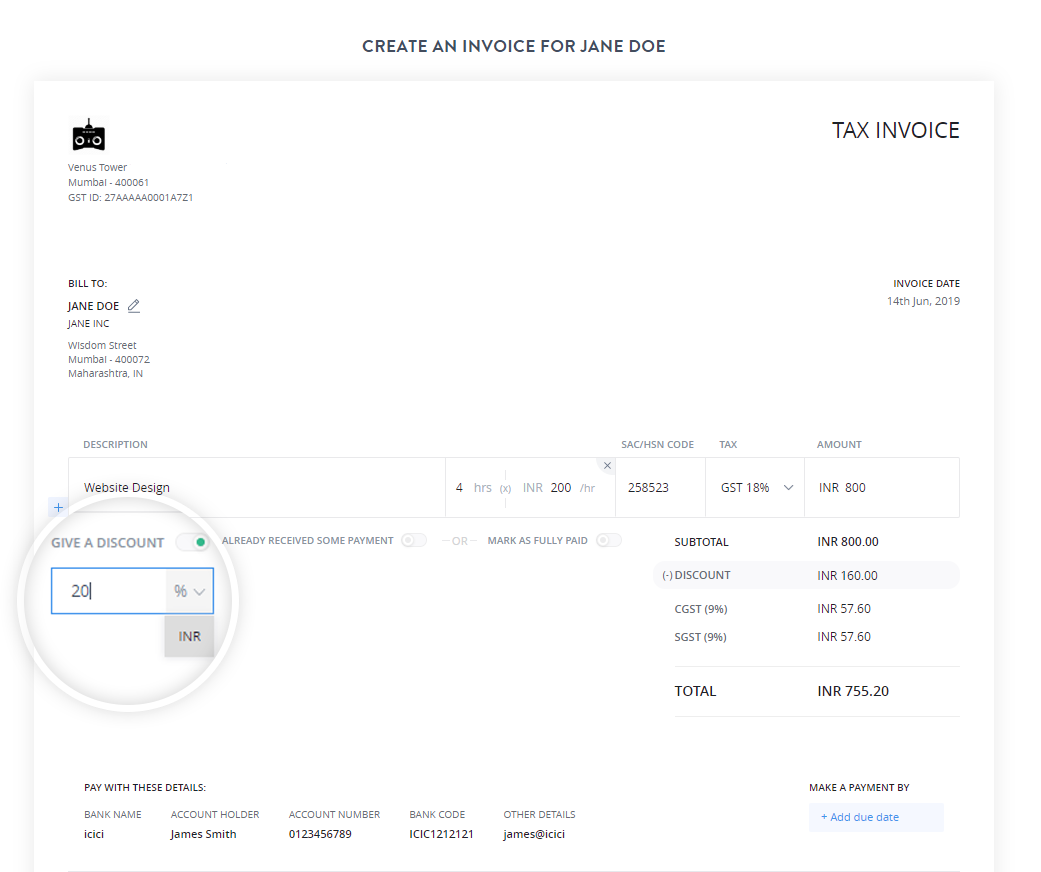
Recording a payment while creating an invoice
There might be instances where you may collect an advance payment from your customer before you start working on the project. You can easily record an advance or mark an invoice as paid by enabling the toggle options as shown below.
Record Partial Payment
To record a partial payment, enable the toggle for Already Received Some Payment. Enter the amount and proceed with the invoice creation.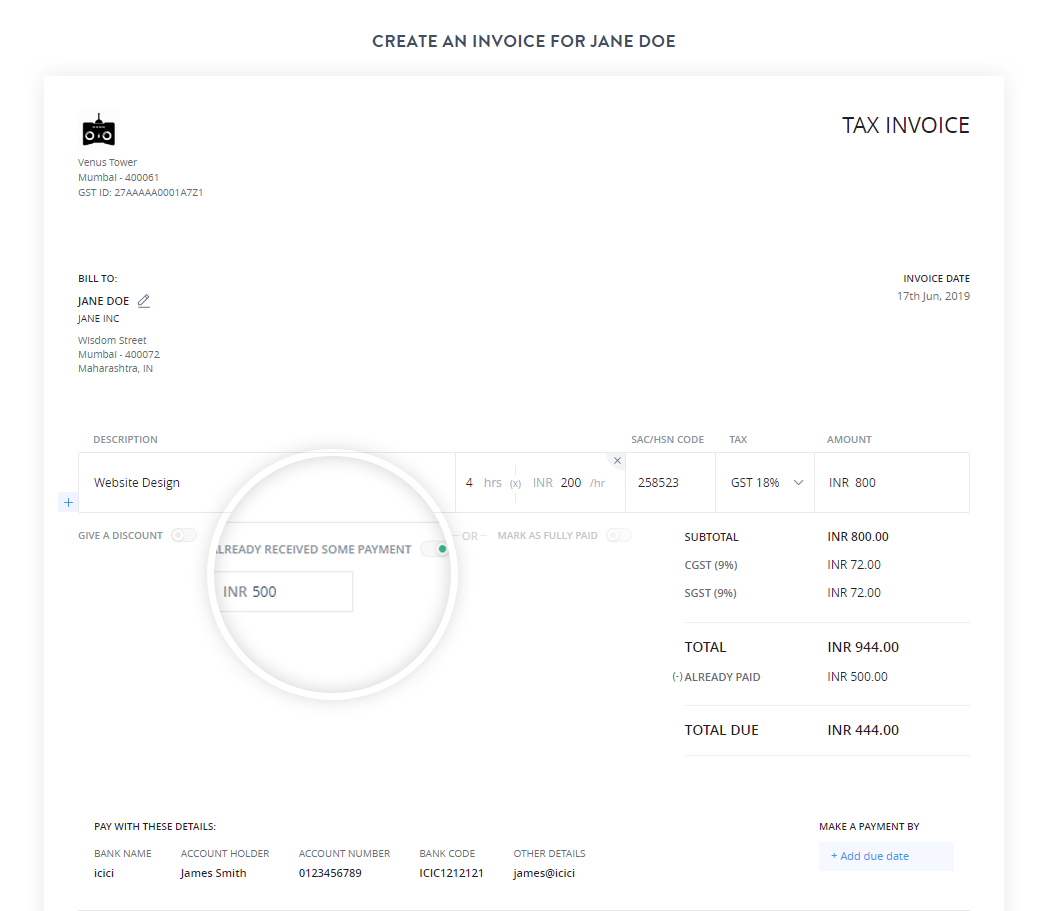
Record Full Payment.
Enable the toggle option Mark As Fully Paid. The invoice status will change to Paid.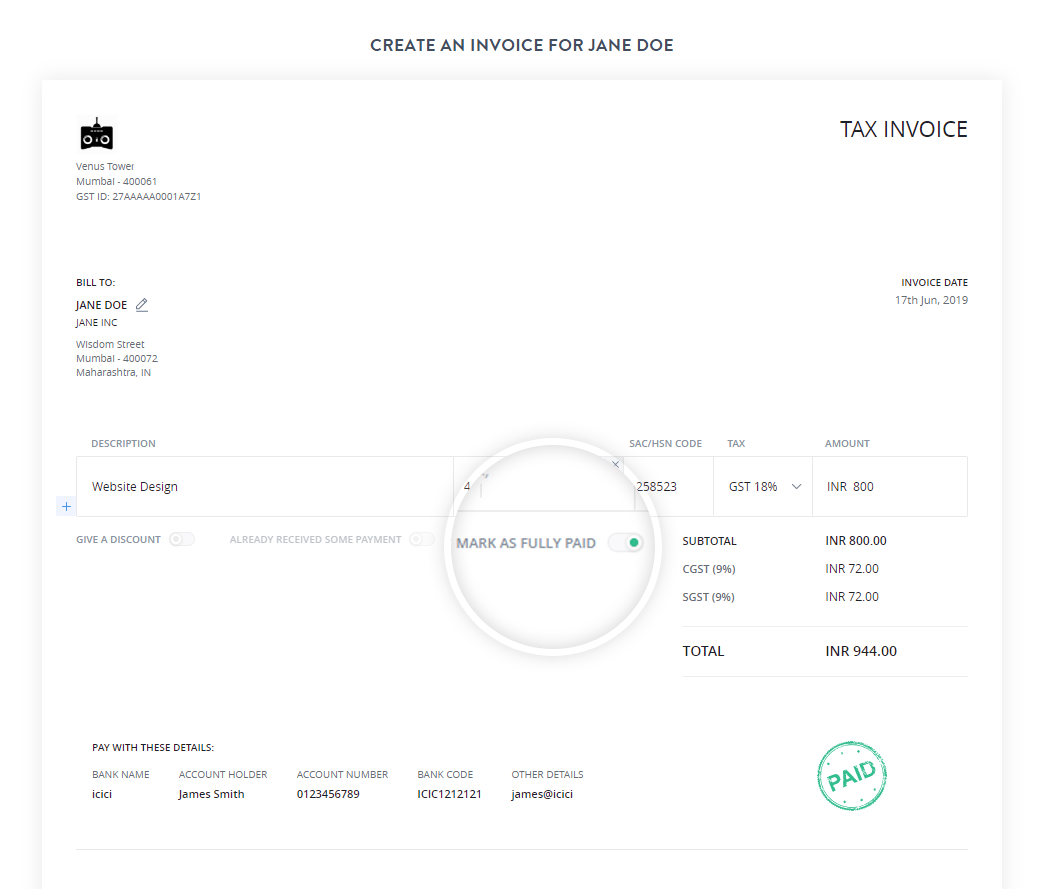
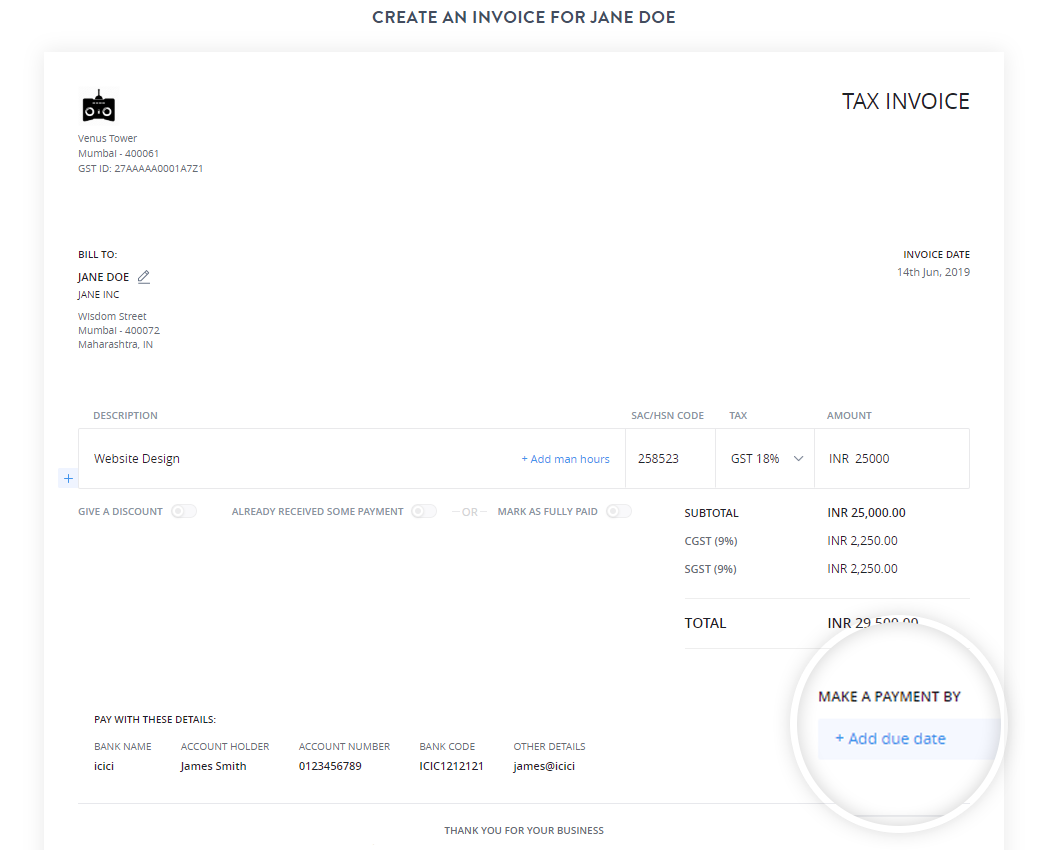
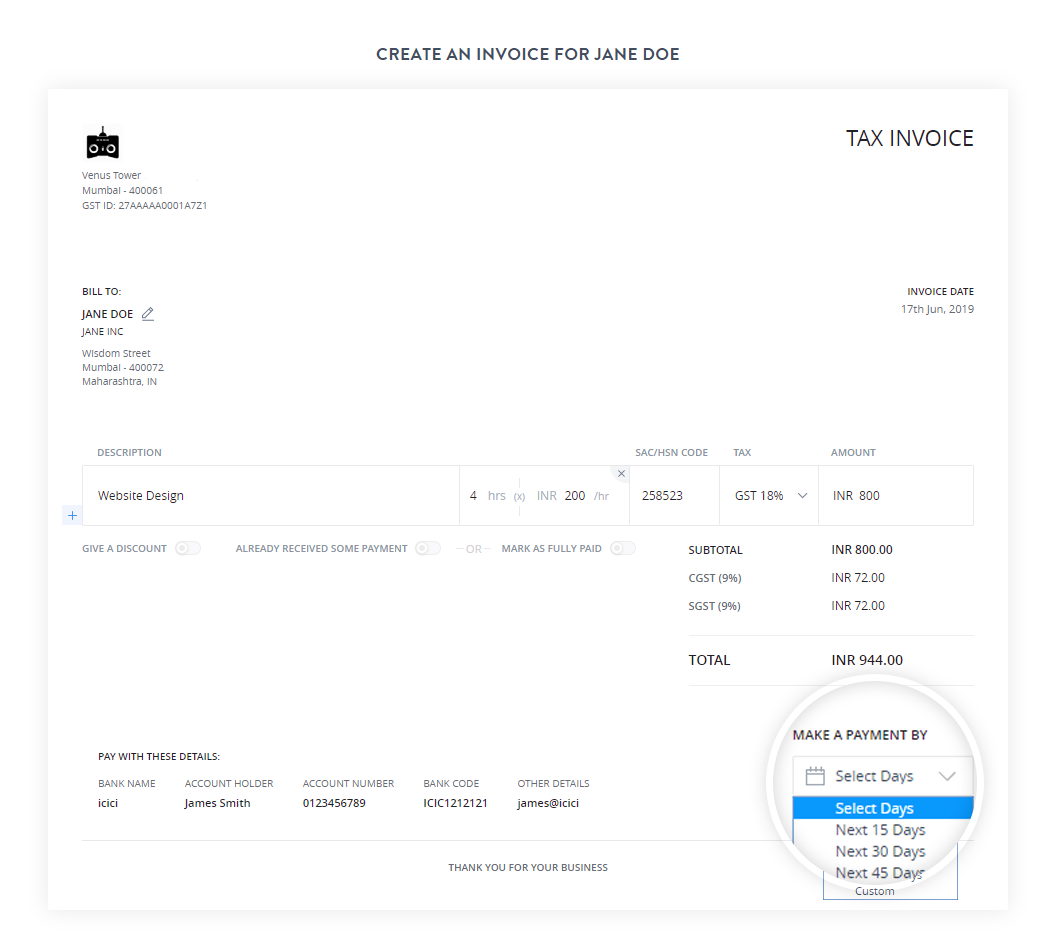
Adding a due date to the invoice
Once a pending invoice passes the due date its status will change to overdue, you can filter overdue invoices from the transactions tab and view all your overdue payments. To add a due date to the invoice follow these steps.
- Under the Make a Payment By section click + Add due date.
- Select the number of days from the drop-down or choose a custom date. The due date will appear on the invoice.
- Once an invoice crosses the due date, they are moved to the overdue tab. Here you can view all your overdue invoices at a glance and send out reminders for payments.
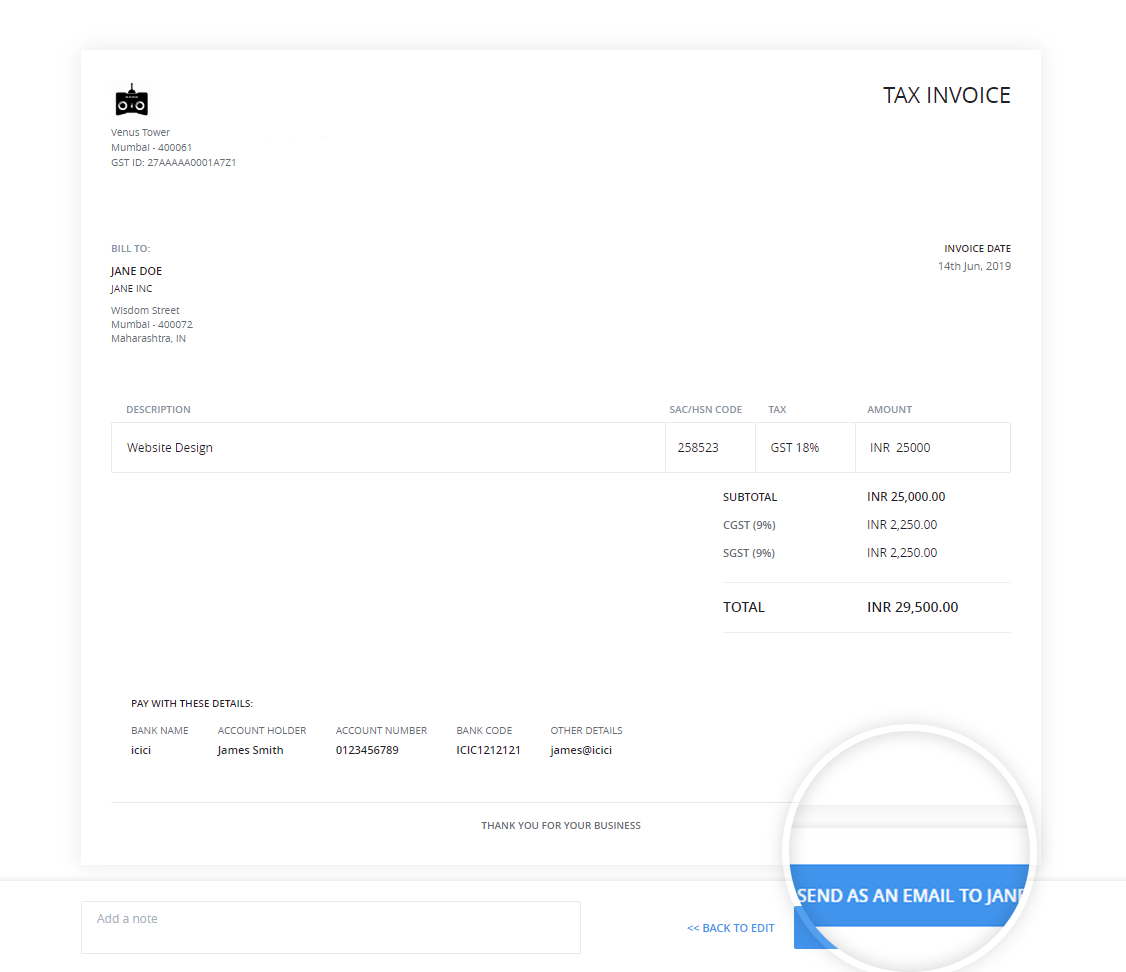
Step 4: Sending the Invoice to the customer.
Once the details are filled, you can click Preview and Send and then click Send As an email to Customer-Name. An email will be sent to your customer.