Overview
SSH (Secured Shell) is a secure way to connect and administer Linux servers. With an SSH connection you can securely transfer files to your servers, monitor disk usage, setup a cronjob and perform many more operations.
In order to use SSH you need to follow the below steps :
- Enable SSH from your control panel
- Connect to the server with a username, password and an IP address
Enable SSH
Step 1: Log in to your control panel. Learn how
Step 2: Navigate to the Order View.
Search the domain name for which you have purchased the Cloud Hosting order and select the domain to view the order information.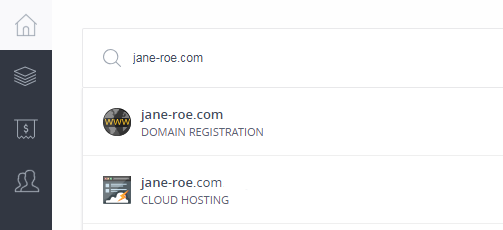
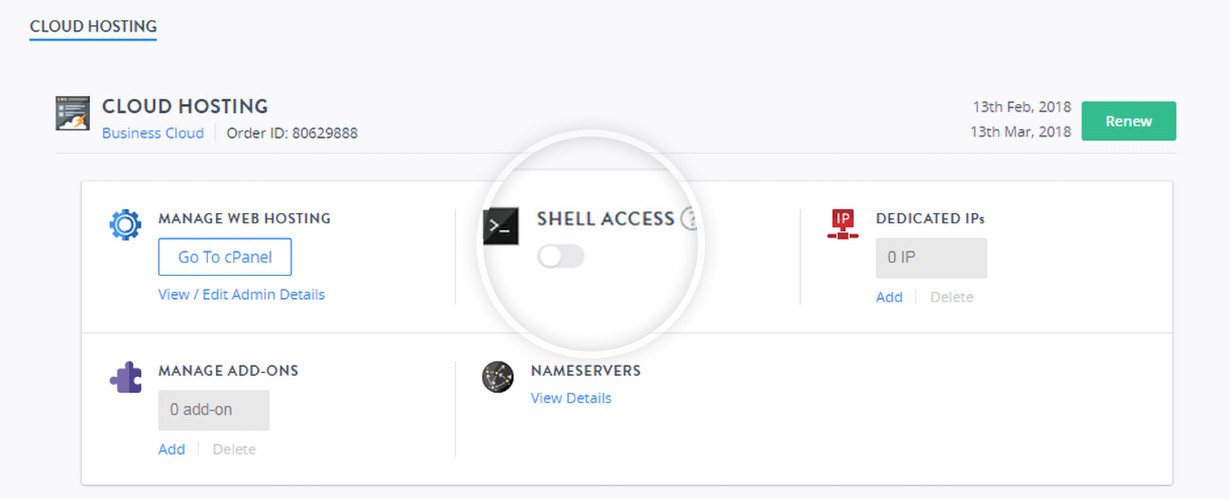
Step 3: Enable SSH Access.
-
In the Order Information View, under the SHELL ACCESS section, click the toggle to enable SSH.
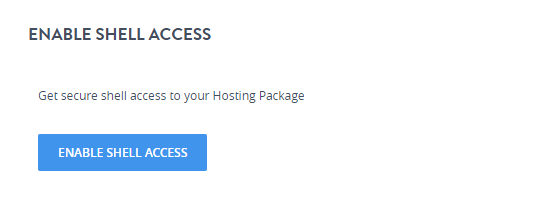
-
Click Enable Shell Access in the next window which appears.
Connect to the Server
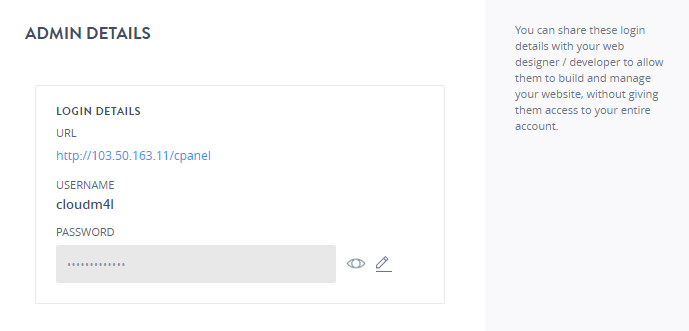
- Before you proceed with connecting to the server, you need to get the IP address, username and the password to connect via SSH.
- Under the MANAGE HOSTING SECTION, click View/Edit Admin Details.
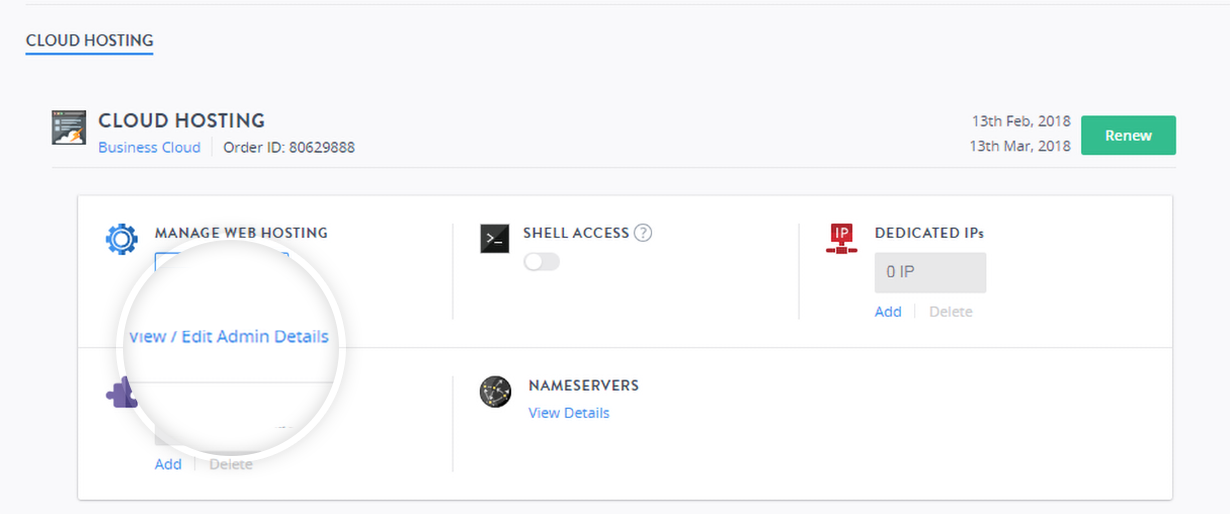
- Note down the IP address, username, and the password.
You can follow the steps below to connect via SSH depending on your operating system
Windows OS
-
Enter your IP address and the port number 2222.
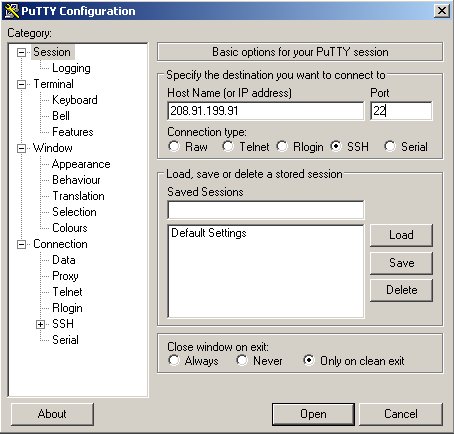
- Log in with your cPanel username and password.
Linux OS
To connect to the server via SSH, run the following command from a terminal:
ssh -p 2222 [email protected]
Replace cpanelusr with your username; and replace ip.add.re.ss with your IP address.
Mac OS
To connect to the server via SSH, run the following command from a terminal:
ssh -p 2222 [email protected]
Replace cpanelusr with your username; and replace ip.add.re.ss with your IP address.