The information listed below describes the various sections and buttons/features visible within your cPanel Reseller Linux Hosting Package with Demo Registrar.
Accessing cPanel
Uploading Content to your Website
To upload content to your Website through an FTP client, use only FTPS on Port 21.
Some FTP clients support both FTPS modes: Explicit and Implicit. In such FTP clients, the Explicit (FTPES) mode needs to be selected.
List of Popular FTP Clients that Support FTPS
Using cPanel
-
All instructions for using your cPanel interface are available in the cPanel User Guide.
-
Management of both Email and DNS is available in your cPanel interface itself.
The following is a list of limitations with regards to some of the features mentioned in the above-mentioned User Guide:
-
Shell access: Your cPanel Account does not allow access via any shell client. You may instead either use FTP or use the File Manager interface within your cPanel Account to upload content.
-
cPanel Password Modification: You may reset your main cPanel Password from your cPanel interface itself. However, you will also have to then update it within the your Control Panel. See details
Softaculous
The Softaculous feature provides a wider array of scripts, that can be installed, upgraded and removed from your website with just a few clicks. We recommend clicking the Softaculous button under the Software / Services section, within your cPanel interface.
WHMCS
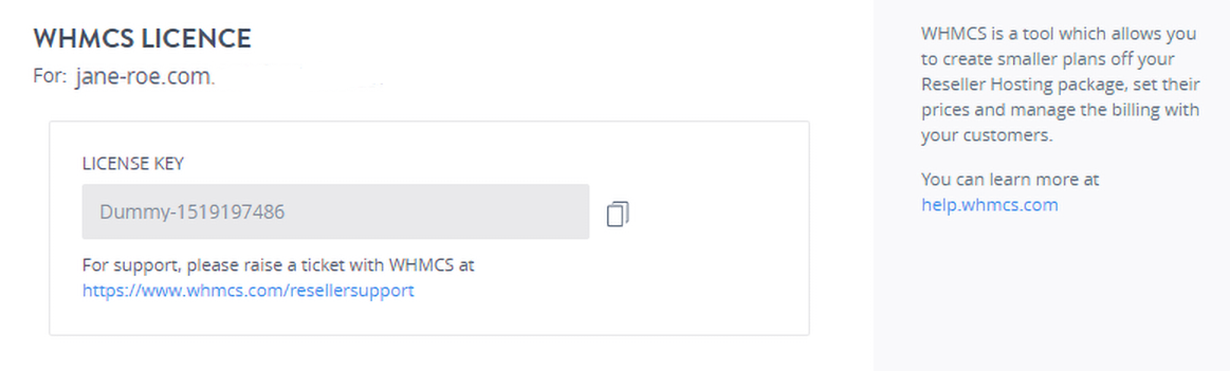
WHMCS is an all-in-one client management, billing & support solution for online businesses. It can be installed from the WHMCS section under the E-Commerce cateogry, within the Softaculous feature. A License Key is required for the installation of WHMCS, which can be obtained from the Order Information view of the Reseller Linux Hosting Order.
To Request/View a WHMCS License Key
-
Log in to your control panel. Learn how.
-
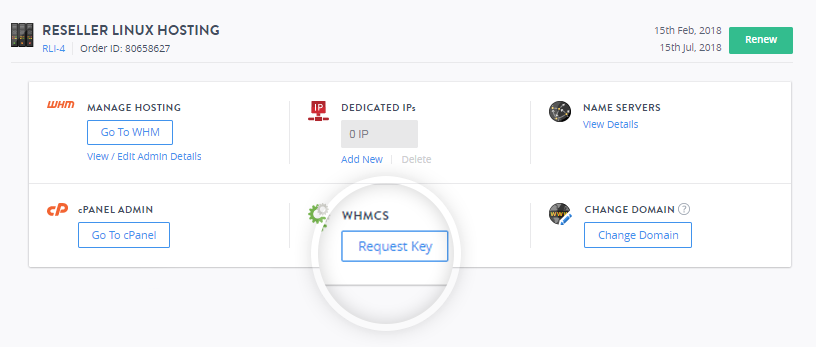
Search the domain name for which you have purchased the reseller hosting order and select the domain to view the order information.
-
Under the WHMCS section, click Request Key.
-
You can view and copy the license key from the pop-up window.
The information listed below describes the various sections and buttons/features visible within your WHM Account with Demo Registrar. Clicking on the link besides the features listed below may require you to navigate to the precise documentation for WHM ver 68.0
Accessing WHM
Using WHM
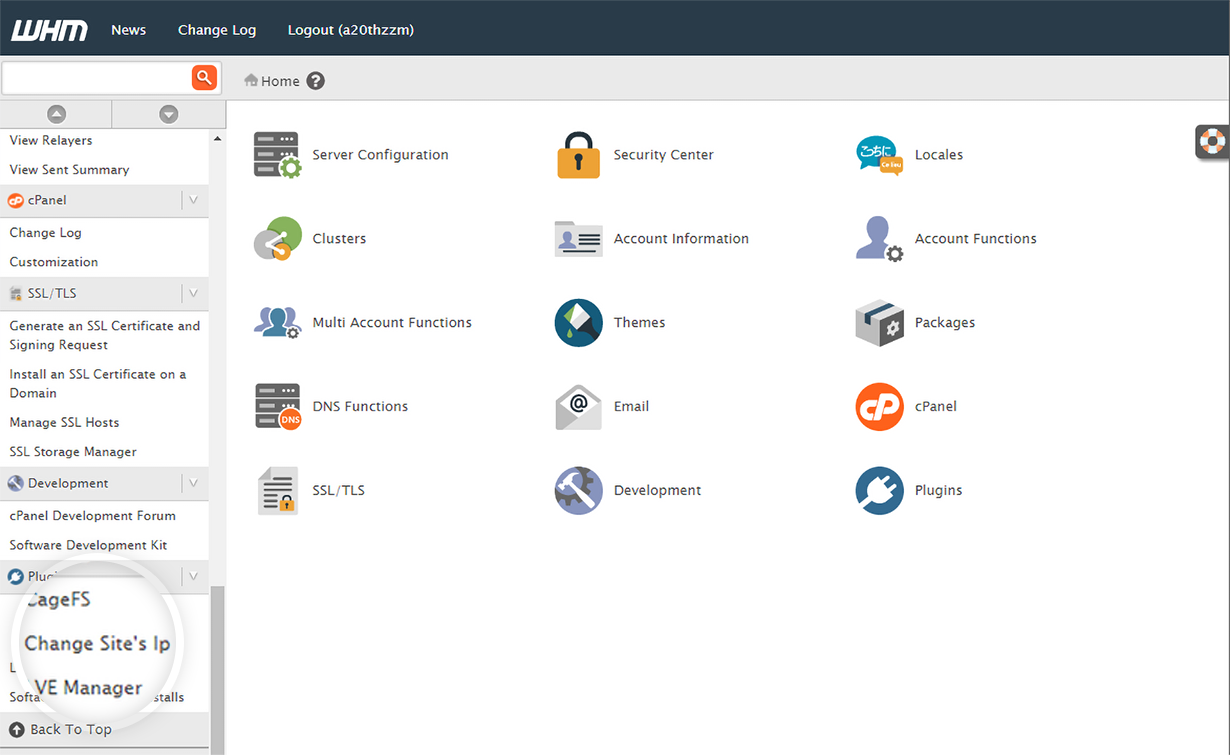
The WHM Home Screen
Find
This functionality helps you to locate a feature within your WHM. Simply type a keyword into the Find box on the top left side of the screen. The menus on the left will automatically filter to show the results.
To show all features of WHM, click the X button to the right of the Find text box.
Server Configuration
Basic cPanel & WHM Setup
Nameservers
This section of the interface allows you to specify nameservers associated with your server. To use this feature, simply enter the nameservers you wish to you use as your primary, secondary, tertiary, etc. nameservers in the appropriate fields and click the Save Changes button.
Support
System Mail Prefrences
This feature allows you to specify how customers should contact you with support requests.Learn How.
Locales
Locale XML Download
This feature allows you download an existing locale (language) in XML format.Learn How.
View Available Locales
This interface allows you to view available locales, cross-referenced against the themes for which they are available.Learn How.
Cluster/Remote Access
Setup Remote Access Key
This feature can be used to generate an access key. This access key can be used for automatic account creation scripts, external billing software, and allowing servers in your DNS cluster to exchange records. Learn How.
Account Information
List Accounts
This feature will list all of the accounts hosted under your WHM Account.Learn How.
List Parked Domains
This feature displays a list of parked domains under your WHM Account.Learn How.
List Subdomains
This feature displays a list of subdomains under your WHM Account.Learn How.
List Suspended Accounts
This feature displays a list of any suspended accounts hosted under your WHM Account.Learn How.
Search Accounts
This feature allows you to search for accounts and access the List Accounts screen.Learn How.
View Bandwidth Usage
This feature displays a list, sorted month wise, that shows you bandwidth utilization by accounts hosted under your WHM Account.Learn How.
Account Functions
Create a New Account
This feature allows you to create new cPanel accounts.Learn How.
Force Password Change
This feature allows you to force a user to change his or her password.Learn How.
Modify Suspended Account Page
This feature allows you to edit the Account Suspended template.Learn How.
Password Modification
This feature allows you to change passwords for any of your existing cPanel Accounts as well as your WHM Account.Learn How.
WHM Password Modification: You may reset your WHM Password from your WHM interface itself, by modifying the password for the main Account. However, you will also have to then update it within the your Control Panel.Learn How.
Skeleton Directory
The skeleton directory exists to let you easily copy the same files into every new account’s public_html and public_ftp directories when the account is created. This feature simply states the location of the skeleton directory.Learn How.
Suspend/Unsuspend an Account
This feature allows you to suspend/unsuspend cPanel accounts.Learn How.
Terminate an Account
This feature allows you to terminate cPanel accounts.Learn How.
Upgrade/Downgrade an Account
This feature allows you to change an account's package.Learn How.
Web Template Editor
This feature allows you to create placeholder web pages.Learn How.
Multi Account Functions
Modify/Upgrade Multiple Accounts
This feature will allow you to simultaneously change the attributes of multiple accounts.Learn How.
Terminate Multiple Accounts
This feature allows you to simultaneously terminate multiple accounts.Learn How.
Themes
Change WHM Theme
This feature allows you to select the theme your WHM interface will use.Learn How.
Packages
Packages are limitations on resources an account is allowed to use. The Packages section provides options of Add a Package, Delete a Package, Edit a Package and Feature Manager.Learn How.
DNS Functions
Add a DNS Zone
This feature allows you to set up a DNS zone.Learn How.
Delete a DNS Zone
This feature allows you to delete a DNS zone.Learn How.
Edit DNS Zone
This feature allows you to edit the records in a domain's DNS zone file.Learn How.
Edit MX Entry
This feature lets you list destination mail servers, designating a priority value to each.Learn How.
Edit Zone Templates
The Zone Template Editor will allow you to edit the default zones that are used when creating DNS entries, under a custom DNS setup.Learn How.
Park a Domain
This feature allows you to park a domain name, pointing it to another domain name hosted under your WHM account.Learn How.
Reset a DNS Zone
This feature allows you to reset the default values for a selected zone file.Learn How.
Mail Troubleshooter
This feature will access a mail routing tracer.Learn How.
cPanel
This feature allows you to change the look of your users' cPanel interfaces by replacing the default images with your own.Learn How.
Change Log
This section displays a list of published builds for cPanel & WHM software. The entries include fixes, enhancements, and patches intended to fix known problems.Learn How.
SSL/TLS
Generate a SSL Certificate and Signing Request
WHM allows you to generate an SSL certificate for your website.Learn How.
Install a SSL Certificate and Setup the Domain
This feature allows you to automatically install your SSL certificate and private key in the correct directories.Learn How.
Manage SSL Hosts
This feature allows you to you share SSL certificates, and manage certificates by domain and user.Learn How.
Plugins
This feature allows you to associate a Dedicated/Shared IP Address with an Account.
-
Click the Change Site's Ip link.
-
From the Your Accounts box, select the Account for which you wish to modify the associated IP Address.
-
Select a Dedicated/ Shared IP Address from the Available IPs box.
-
Click the Change IP button.
-
A Dedicated IP Address can be assigned to only one Account, whereas a Shared IP Address can be assigned to multiple Accounts.
-
Modifying the IP Address for an Account from Dedicated IP Address to Shared IP Address will release the Dedicated IP Address to the pool of available IP Addresses.
Mod Security
The link within this section provides information about mod_security versions and rules.
Softaculous - Instant Installs
From within the Plans section, you can manage Access Control Plans. For each Access Control Plan, you can select the Packages & Users to whom the Access Control Plan will apply and the scripts that you wish offer under it.