Apache Tomcat is an opensource webserver product of Apache Foundation like Apache HTTP server. It is used to deploy Java Servlet and JSP applications. To deploy an application in Tomcat we can simply create a war file and deploy them. This article will help you to install Tomcat 7 on CentOS/RHEL servers. For servers with cPanel or Plesk, the installation of Tomcat can be achieved via easyapache and autoinstaller respectively.
Step 1: Navigate to the Order View.
- For Dedicated Server orders
In the Order Information View, under the MANAGE DEDICATED SERVER section, click View/Edit Admin Detail.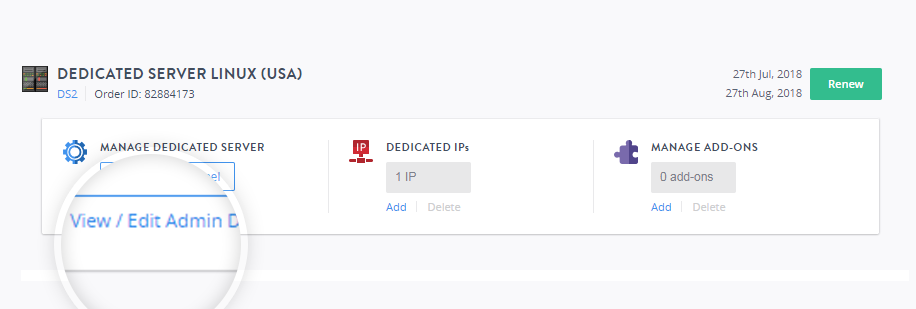
- For VPS Linux orders
In the Order Information View, under the MANAGE VPS HOSTING section, click View/Edit Admin Detail.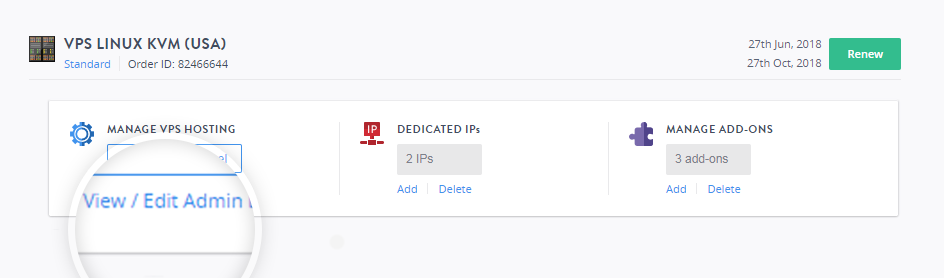
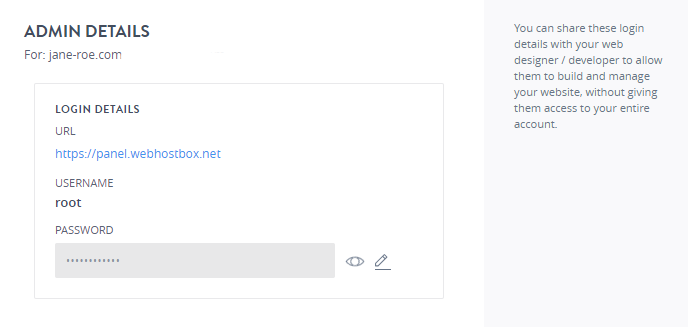
- Note down the root username and the password, this will be required to log in to the account.
Step 2: Access your Server Management Panel.
Learn How
You can also log in to your server using SSH or putty using the root credentials for your account.
Step 3: Get VNC Access.
In the Server Management Panel, click GET VNC ACCESS. You will be presented with a command prompt. 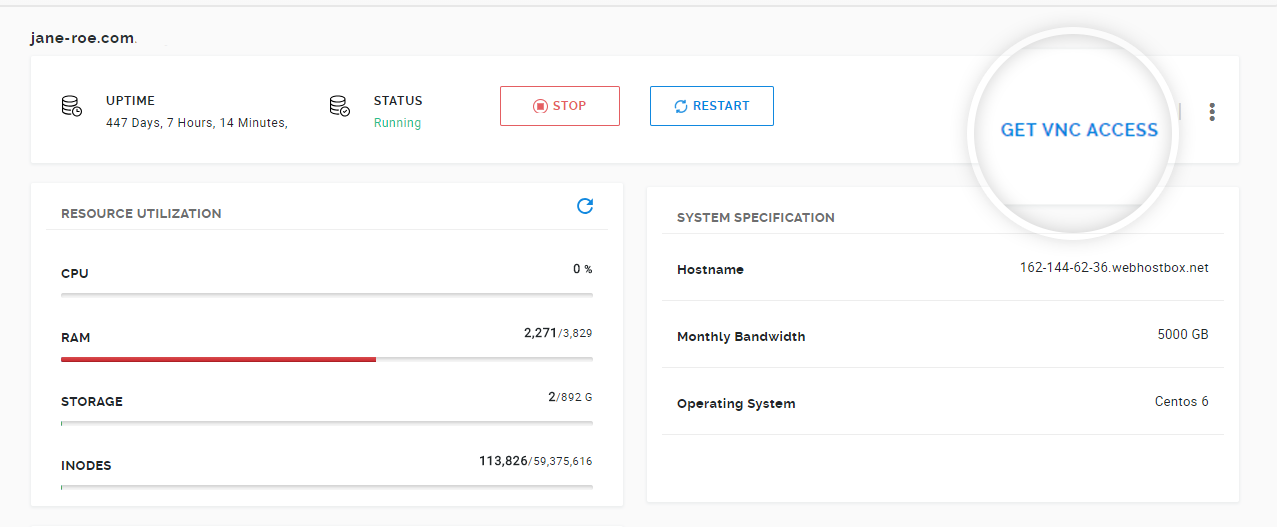
Log in to the server using the root credentials provided in Step 1.
Step 4: Check Java Version.
JAVA is the primary requirement for Tomcat 7 installation. Make sure you have JAVA SE 6 or Later version installed on your system. Use the following command to check if you have java installed already on your system.
java -version
Tips
You will see the above error if java is not installed on your server.
Follow the steps below to install java on to your system.
Installing Java
Java has two implementations, which are Open JDK and Oracle Java.
JRE is a subset of JDK and if you already installed the JDK package you do not need to install JRE.
Open JDK
Install OpenJDK 8 JDK
sudo yum install java-1.8.0-openjdk-develInstall OpenJDK 8 JRE
sudo yum install java-1.8.0-openjdk
Step 5: Downloading Tomcat 7 archive.
Download Apache Tomcat archive file from Apache tomcat official download page. You can use below wget command to download it.
-
Change your directory to tmp directory.
cd /tmp -
Execute the command to download tomcat from the apache servers.
wget http://www-eu.apache.org/dist/tomcat/tomcat-7/v7.0.90/bin/apache-tomcat-7.0.90.tar.gz -
Once the download is complete, extract the archive file in /tmp directory and move to a location as per your need. We are placing this under /usr/local directory.
tar xzf apache-tomcat-7.0.90.tar.gz
mv apache-tomcat-7.0.90 /usr/local/tomcat7
Step 6: Starting Tomcat.
Tomcat is very easy to use, there is no need to compile its source. You simply extract the archive and start the tomcat server. Tomcat by default starts on port 8080, Make sure no other services are running on same port using ‘telnet localhost 8080'. cd /usr/local/tomcat7
./bin/startup.sh
Step 7: Accessing Tomcat in the browser.
Tomcat server works on port 8080 by default.
Connect to the host server on port 8080. http://yourdomainname.com:8080
Step 8: Setup User Accounts.
Finally, we need to create user accounts to secure and access admin/manager pages.
Edit conf/tomcat-users.xml file in your editor and paste it inside <tomcat-users> </tomcat-users> tags.
Step 9: Stopping Tomcat.
Finally, if you feel that there are no need of Tomcat in your system, You can simply stop it by running the below command from your tomcat home directory.
./bin/shutdown.sh