Your server's main/shared IP address may get blacklisted by one or many Realtime Blackhole List (RBL) due to different reasons. In such situations, it becomes very difficult to receive/send emails, especially to servers using RBL based filters. A quick solution is to route the emails through a secondary IP address (if available) on the same server which is not blacklisted by any of the RBL's.
The exim mail server on cPanel allows you to change the default IP address used by the mail server so that you can route all the emails through this new secondary IP address.
Here are the step by step instructions for you to configure your Exim mail server to use new IP address.
Step 1: Navigate to the Order View.
- In the Order Information View, under the MANAGE VPS HOSTING section, click View/Edit Admin Detail.
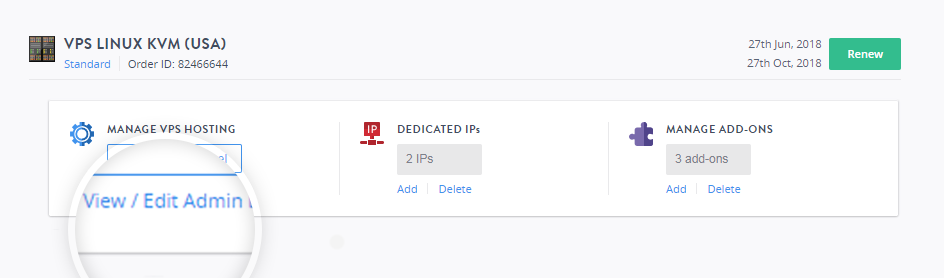
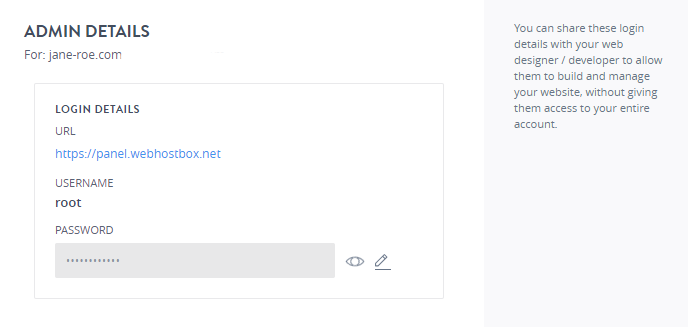
- Note down the root username and the password, this will be required to log in to the account.
Step 2: Access your Server Management Panel.Learn How.
You can also log in to your server using SSH or putty using the root credentials for your account.
Step 3: Get VNC Access.
In the Server Management Panel, click GET VNC ACCESS. You will be presented with a command prompt. 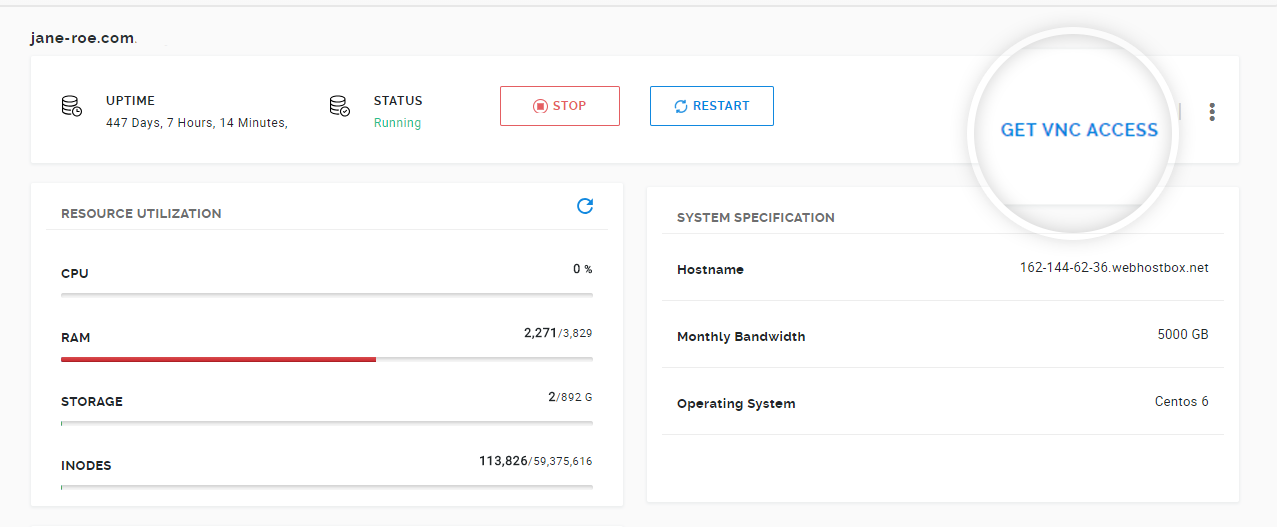
Log in to the server using the root credentials provided in Step 1.
Step 4: Configure Exim.
- Shutdown the Exim service.
service exim stop or /etc/init.d/exim stop - Edit your Exim configuration file.
vi /etc/exim.conf - Go to "remote_smtp" section under "TRANSPORTS CONFIGURATION".
By default it would look like below:
Quote:
remote_smtp:
driver = smtp
interface = ${if exists {/etc/mailips}{${lookup{$sender_address_domain}
lsearch{/etc/mailips}{$value}{}}}{}}
helo_data = ${if exists {/etc/mailhelo}{${lookup{$sender_address_domain}
lsearch{/etc/mailhelo}{$value}{$primary_hostname}}}{$primary_ho stname}}
Remove or comment line containing "interface" and "helo_data" and add new "interface" to match with that of your new IP address. It should look as follows:
Quote: remote_smtp: driver = smtp interface = 12.12.12.12 # Your IP address. - Save your changes and exit out from your Exim configuration file.
- Start Exim service on your server.
service exim restart or /etc/init.d/exim restart - Set a reverse DNS for the new IP address to point a valid FQDN.
Please get in touch with our support team to get this part done.
- Try sending a test email and you will find that, it was sent using this new IP address configured under your exim configuration. You can verify it by checking the header of new email under exim's log file i.e /var/log/exim_mainlog
- Finally, to make the IP address change permanent, add new IP address to the /etc/mailips file. This would ensure that all the changes made above do not get reverted due to a cPanel scheduled update.